Monday, October 10, 2011

Why Bagel Bread Never Looks Like Customary Bread

Do you like doughnuts? what about Japanese cakes? If you do, then you will love bagels as they are healthier cooked without fat.

Bagel bread is a ring of bread that is raised with a well-regulated amount of yeast to make sure of a somewhat dense, crusty but not too "bready" bread. Traditional bagel recipes usually contain no fat, and genuine bagels never look like customary bread. From here alone, you'll be getting an understanding of the uniqueness of bagels.
 
One thing that makes it unique of all baked goods is the way it is cooked in boiled water prior to baking. It is one of a kind baked-good being prepared differently from other goods made in the oven, like traditional bread.

Modern bagels come in softer and sweeter varieties that are already sold in sweet and fruit flavors. All you have to do is place the pieces into a toaster. In pastry houses, an order of bagels is served with cream cheese, jam, fruit-flavored glazes and other toppings. If you wish for the more traditional bagel, plain or onion-flavored are your most popular choices. They make one of our folks' favorite sandwiches with egg, cheese, ham, and other breakfast foods.

Here's a video on how to make bagels from Susan's Baking School. Enjoy!

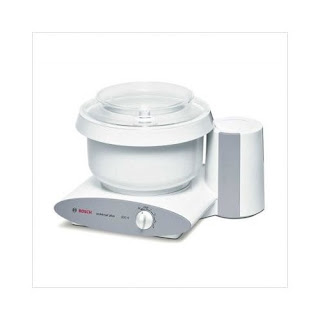
Why Buy a Bread Machine

Bread machines or bread makers are fast becoming popular and popular and is used almost as much as the microwave oven. And why buy one?

The smell and taste of freshly baked bread is hard to resist and admit it or not, you wish for these fresh warm bread than ready-made ones. But the question is you simply hate "kneading!"


These machines can be considered another of the few miracle kitchen appliances to make our cooking and baking lives more enjoyable. Finding bread machines online has never been more easier, except maybe which one to choose for your families needs.

Let the bread maker do the kneading, she enjoys the job! Bread machines with a view window allows one to monitor the bread baking without raising the lid, saving energy and time. Make sure the loaf pan is non-stick coated for easy cleaning.

Most bread makers today come with non-stick loaf pans but there are a few that still don't. Another great feature to have is the additional ingredients beeper, which comes in handy for adding fruit and more thru out the bread cycle.

Now, you understand why you need a bread maker in your kitchen?

Wednesday, October 27, 2010

Baking in An Earthenware

I got a good advice that some recipes can be converted for clay pots by increasing temperature by 100 degrees and deducting a half an hour of cooking time.

Maybe if you are serious in your everyday cooking and you want to make sure of increased flavor, tenderness with all the natural nutrients retained in food, it's time you go for a clay baker. I suggest Romertopf Clay Bakers. My Mom's Romertopf prepares quick, super quality and healthy dishes anytime the whole family gathers up. And for her bread, she gives us the bigger one from a recipe she said from breadtopia.com. She would put it in the cold oven, preheat, and then drop the loaf (on parchment) into the hot bottom and cover for the first 15 minutes. The loaves look and taste so professional. I wish she had two so I could make both loaves at the same time.

I actually became intrigued by the idea that I wished I had my own Romertopf Bread Baker. Now I'm saving up for this and I can't wait to bake my own claybaked bread in fabulous crust...yes the crust is what I am after.

Here's a photo from Teresa ( I got from the Fresh Loaf Forum).


I was really impressed by the loaf! I was wondering if it was because the pot is so big, maybe too big?

Mom said I can prefer cast iron enamel dutch oven, but I still would go for clay bread baker... perhaps with my claybaker sitting in my shelf, I'd get great rise and beautiful color, great crusts and crumbs anytime!

Thursday, October 14, 2010

Baking with Kids

I don't have kids but I find this very interesting.

Once children are old enough to stand on step stool at a kitchen counter, you can start involving them in simple kitchen tasks. Start baking with your kids! It is important for children to know how their food is prepared so they will learn while they're young. This is also a wonderful way to introduce them to new foods and tastes.

Your 3 to 6 years old will love adding and stirring ingredients in a bowl. The older ones will be thrilled filling and leveling measuring spoons and cups. Not even that, they will already enjoy learning how to beat ingredients with a wire whisk. The 8-10 years old can be responsible enough to prepare simple recipes with few ingredients with little adult intervention. This age starts to solve little problems too. You can begin teaching your 11-13 years old teeners on the proper use of oven mitts and where to place the hot dish when removing it from the oven to avoid burned fingers or scorched countertops). Some can even prepare recipes without supervision.

When making a recipe with children, it is always advisable to set up everything on a baking sheet before you start mixing and baking. This will allow the children to see every ingredient, keeping down the mess, and you are sure all ingredients will be added. To prevent bowls or baking sheets from slipping, keep in place with a dampened dishtowel underneath.

Your kids will appreciate the value of their young presence in the preparation of your meals. You will have fun with them baking this Brownie Bites recipe (courtesy of The Ultimate Diabetes Cookbook by Carol Gelles)

Brownie Bites

Ingredients:

  • 6 tablespoons butter
  • 1 1/2 squares unsweetened chocolate
  • 3/4 cup sugar
  • 1/3 cup all-purpose flour ( or replace it with whole wheat flour, its healthier)
  • 2 eggs
  • 1 teaspoon vanilla extract
Directions:
  • Preheat oven to 350°F. Heavily grease and flour an 8-inch square baking pan.
  • In a 1-quart saucepan, heat the butter and chocolate over medium-low heat until completely melted, about 4 minutes.
  • In a medium bowl, beat the sugar and eggs until light in color, about 3 minutes. Beat in the chocolate mixture and vanilla, then stir in the flour.
  • Pour into baking pan and bake 30 minutes. Let cool completely.
  • Cut into 20 squares.
  • Makes 20 chocolate brownie bites.
Enjoy!